
Import users from a file
Add many users at one time from a file (CSV, TSV or XLSX). Each person gets an invitation e-mail and one role. You need the permission Import users.
Before you start
- The import adds only users who sign in with e-mail. A file never holds a username or a password.
- Each row gives one role at one place. Give more roles later on the user detail page.
- For each row, you must be able to add the user and give the role at that place yourself. The system checks the rows with the same rules as New user.
- You cannot import files in a support session.
- The app can show Confirm it is you when you upload, import or discard a file. Type your password in Password. If the dialog also shows Code from the app, type the code. Then select Confirm.
Prepare the file
- Select Users.
- Select Import users.
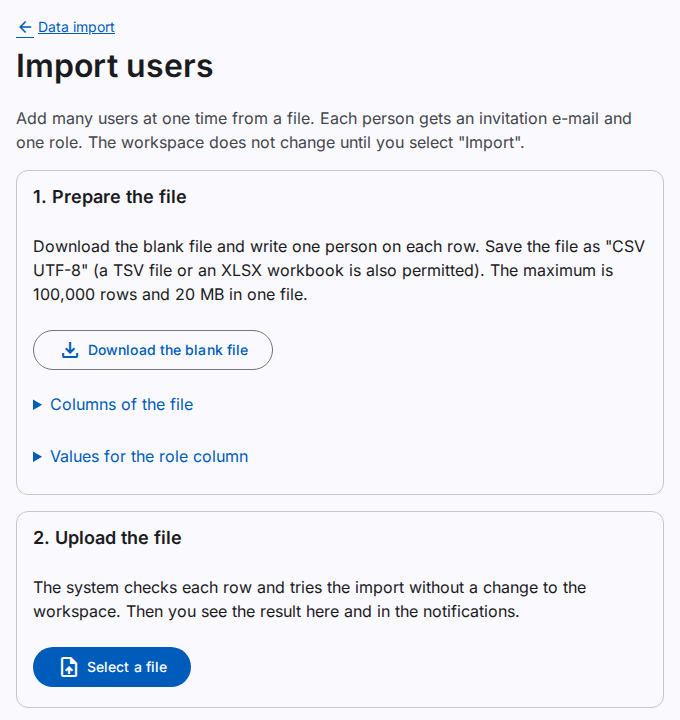
- Select Download the blank file.
- Write one person on each row. Row 1 has the column names.
- Save the file as "CSV UTF-8". A TSV file or an Excel workbook (XLSX) is also permitted.
Open Columns of the file to see each column and what to write. Open Values for the role column to see the values for the role column. Write the code or the role name. Some roles are only for the workspace, a company, or a branch. An empty company_code gives the role for the whole workspace. An empty branch_code gives the role for the whole company. The page shows the maximum number of rows and the maximum file size.
Upload and check the file
- Select Select a file.
- Select your file.
The file shows under Uploaded files with the status Checking. The system checks each row. Then it tries the import without a change to the workspace. You see the result on this page and in the notifications.
The status is then one of these:
- Ready to import: the file has no errors.
- Has errors: some rows have errors. The system imports no row.
- Refused: the system cannot use the file. Read the message.
Correct the errors
- Select the file name under Uploaded files.
- Read the Messages. Each message shows the row and the column.
- To see all the messages in a file, select Download the error report.
- Correct the rows in your file.
- Upload the corrected file again.
A message with Warning: does not stop the import. For example, the system ignores a column that it does not know.
Import the users
Caution: You cannot undo the import in one step. You can cancel each invitation on the Users page.
- Select the file name under Uploaded files.
- Select Import (users: …). The number tells how many users get an invitation.
- If the file has warnings, select the check box I read the warnings (…). Import the file with them.
- Select Import.
The status is Importing and then Imported. The system adds all the users or no user. Each user gets an invitation e-mail and shows on the Users page with the status Invited.
Discard a file
- Select the file name under Uploaded files.
- Select Discard.
- Select Discard in the dialog.
The system deletes the file and its rows. No user is added. The system also deletes the file and its rows of every upload after 90 days.